You can use your iPhone mic on PC right now — no expensive audio gear required. Connect via USB cable, a 3.5mm adapter, or a wireless app, configure your Windows input settings, and you're recording within minutes. If you're building out your audio setup, browse our tech guides for more practical hardware and software walkthroughs.
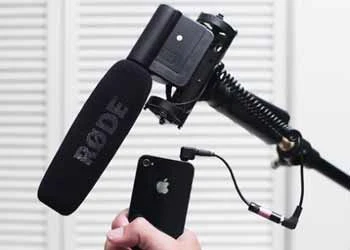
Here's the thing most people miss: the iPhone carries a professional-grade microphone array with hardware noise cancellation and beamforming. Apple built it to handle voice calls in loud environments, which makes it dramatically better than the single-capsule mic buried inside most laptops. You're sitting on a quality audio input that costs nothing extra to use.
There are three main methods for connecting your iPhone as a PC microphone — USB cable, 3.5mm adapter, and wireless app-based streaming. Each method has different trade-offs in latency, setup complexity, and audio quality. This guide covers all three with step-by-step instructions, plus tips to squeeze the best sound out of each approach.
Contents
Laptop and desktop manufacturers treat built-in microphones as afterthoughts. You typically get a single omnidirectional capsule mounted in a spot that faces the keyboard — picking up every keystroke, fan spin, and desk vibration along with your voice. The iPhone takes a completely different engineering approach.
Modern iPhones include three or more microphones positioned at the bottom, top, and rear of the device. The onboard processor blends signals from all of them in real time, isolating your voice and suppressing ambient noise. That's beamforming technology — the same principle used in broadcast-quality studio microphones — running on a phone you already own.
Here's how the iPhone mic stacks up against common PC audio options:
| Microphone Type | Noise Cancellation | Frequency Range | Typical Latency | Cost |
|---|---|---|---|---|
| iPhone Built-In Mic | Hardware + software | 20Hz – 20kHz | Near zero (USB) | Already owned |
| Built-In Laptop Mic | Minimal or none | 100Hz – 8kHz (typical) | Near zero | Already owned |
| USB Desktop Mic | Varies by model | 20Hz – 20kHz | Near zero | $30 – $150+ |
| Wireless App Mic | Software only | 20Hz – 20kHz | 10–50ms (Wi-Fi) | Free – $10 |
People reach for the iPhone mic on PC in a wide range of situations. Some of the most common include:
If you're also working with wired audio connections, our guide on how to use a headset mic on PC with one jack covers the adapter approach for standard headsets in detail — many of those principles apply here too.
Start with Method 1 if you want the best audio quality and lowest latency. Methods 2 and 3 are solid alternatives if you need a cable-free setup or don't want to install extra drivers.
A direct USB connection gives you zero-latency audio with no wireless interference. You need your iPhone's charging cable (Lightning or USB-C) and iTunes or Apple Mobile Device Support installed on your PC.
Pro tip: Keep your iPhone screen on and unlocked during the session. On some iOS versions, the screen locking causes the audio stream to pause or drop entirely.
If your PC has a dedicated mic input jack (or a combined headphone/mic port), you can connect via a TRRS audio splitter. This works well on desktop PCs and older laptops that still have separate audio jacks.
One important detail: a standard headphone splitter won't pass the microphone signal — you specifically need a TRRS splitter that separates both audio channels. For more context on why the connector type matters, Wikipedia's article on phone audio connectors explains the TRRS standard clearly.
Several apps stream iPhone audio to your PC over Wi-Fi or Bluetooth. The setup takes a few extra steps but cuts the cable entirely.

The most reliable wireless options are:
For WO Mic: install the app on your iPhone, download the Windows client from the developer's site, connect both devices to the same Wi-Fi network, and select "WO Mic Device" as your input in Sound Settings. That's it — most users are up and running in under five minutes.
Connecting your iPhone is only half the equation. Small adjustments to positioning, room acoustics, and software settings make a real difference in recording quality — and none of them cost anything.

Where you place the iPhone matters more than most people expect. Follow these placement rules and your audio will improve immediately:
Soft furnishings help too. A room with carpet, curtains, and bookshelves absorbs reflections and delivers a noticeably drier, more professional sound compared to a bare concrete or hardwood space.
Once the physical setup is dialed in, tune your settings in Windows and your recording app:
For anyone getting into recording workflows more seriously, our guide on how to record a Pocket Operator covers signal chain fundamentals — gain staging, monitoring, and clean capture — that apply directly to iPhone mic recording as well.
Most problems come down to driver issues, incorrect settings, or a cable that isn't seated properly. Work through these fixes in order before assuming anything is broken.
If your iPhone doesn't appear as an input device in Sound Settings, try these steps:
Warning: If your iPhone appears under "Other devices" in Device Manager with a warning icon, the audio driver failed to install completely — a full iTunes reinstall almost always resolves it.
A weak or distorted signal is almost always a settings problem, not a hardware fault:

Yes. Apps like WO Mic and EV Voice stream audio wirelessly over your local Wi-Fi network. You install the iOS app on your iPhone, the Windows client on your PC, and a virtual audio driver that makes the iPhone appear as a standard input device. Latency on a good local network runs under 20ms — fast enough for calls and streaming.
For the USB cable method, yes — iTunes installs Apple Mobile Device Support, which includes the drivers Windows needs to recognize your iPhone as an audio input. You don't need to actively use iTunes during recording; the drivers just need to be present. For the wireless app method, no iTunes installation is required.
It works with both. Once your iPhone is set as the active input device in Windows Sound Settings, any application that uses the Windows audio stack — including Zoom, Teams, Google Meet, Discord, and Skype — will pick it up automatically. You can also set it per-app inside each application's audio preferences.
Wireless methods introduce some latency — typically 10–50ms over Wi-Fi depending on your router and network conditions. For voice calls and most streaming scenarios, this is imperceptible. For live music performance or tight audio-video sync work, use the USB cable method instead, which delivers near-zero latency.
Yes. Your iPhone handles the microphone input and your PC handles speaker output independently. Set your iPhone as the input device and your PC speakers or headphones as the output device in Windows Sound Settings. There's no conflict between the two, though you should use headphones during recording to avoid microphone feedback from your speakers.
When connected via USB or a wireless app, the iPhone defaults to its bottom microphone — the primary capsule Apple optimized for voice clarity. The multi-mic array and noise cancellation processing still run in the background and feed the blended signal to your PC. You get the full benefit of the iPhone's audio hardware, not just a single raw capsule.


About Malcolm Woods
Malcolm Woods is a technology writer and sustainability advocate with a background in consumer electronics and a long-standing interest in the intersection of technology and environmental impact. He has spent years evaluating tech products — from smartphones and smart home devices to solar-powered accessories — with a focus on real-world performance, longevity, and value. At the site, he covers tech accessory reviews, smart home gear, buying guides, and practical how-to content for everyday technology users.
Go for the FREE Gifts. Or check out for free energy books from our best collection.
Remove Ad block to reveal all the secrets. Once done, hit a button below