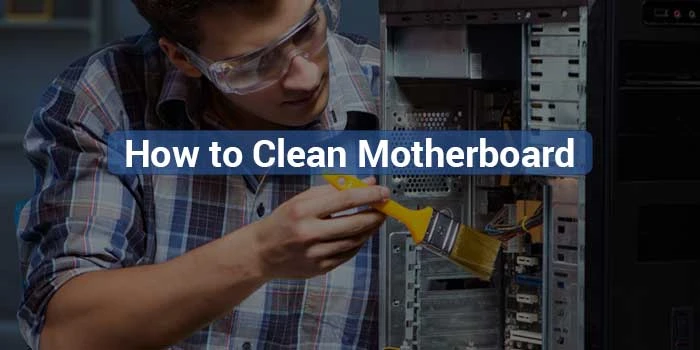
Studies show that dust buildup is responsible for up to 70% of premature computer hardware failures — and your motherboard is always the first to suffer. If your PC is running hotter than usual, crashing without warning, or simply underperforming, a layer of grime on your most critical component is often the real culprit. Learning how to clean motherboard components safely is one of the highest-value skills any PC owner can develop. Whether you're maintaining a desktop or a laptop you depend on daily, regular cleaning directly extends the hardware's lifespan.
The good news is that you don't need a repair shop or expensive equipment. Five proven methods — from compressed air blasts to isopropyl alcohol treatments — cover virtually every cleaning scenario you'll encounter. Each one suits a different level of contamination, so knowing which to reach for is half the battle.
Before you touch anything, get one rule straight: static electricity can destroy a motherboard instantly. Always power down completely, unplug the machine, and ground yourself before starting. With those basics out of the way, here's everything you need to do this correctly.
Contents
Dust doesn't just sit there looking bad — it acts as an insulating blanket over your board's surface, capacitors, and solder joints. Heat builds up with nowhere to go. Your CPU and GPU start thermal throttling, deliberately slowing themselves down to avoid permanent damage. Over time, repeated heat cycles cause micro-fractures in solder connections, and those fractures compound until something fails entirely.
According to Wikipedia's coverage of electrostatic discharge, a static discharge as low as 10 volts — completely imperceptible to a human — can damage sensitive integrated circuits. Dust particles actively carry and transfer that charge directly onto your board's traces.
If you're pairing your motherboard with a demanding processor like those covered in our guide to the best CPU for 1080 Ti builds, a clean motherboard becomes even more critical. A dirty board creates thermal bottlenecks that prevent your hardware from reaching its actual potential.
If your PC shuts down under load but runs fine at idle, dust-clogged heat pathways are almost certainly the cause — not a failing component.
Not every cleaning situation calls for the same approach. Here's a direct comparison so you can choose the right method before you open the case:
| Method | Best For | Risk Level | Approximate Cost | Board Removal Needed? |
|---|---|---|---|---|
| Compressed Air | Light dust, routine maintenance | Low | $5–$15 | No |
| Isopropyl Alcohol (90%+) | Sticky residue, thermal paste | Low–Medium | $5–$12 | Recommended |
| Thinner Solvent | Stubborn flux or adhesive | Medium–High | $8–$20 | Yes |
| Electronic Cleaning Spray | General cleaning, connector contacts | Low | $10–$22 | Recommended |
| ESD-Safe Hand Vacuum | Loose debris after air cleaning | Low (if ESD-safe) | $20–$45 | Optional |
For most users doing routine maintenance every six months, compressed air combined with an isopropyl alcohol wipe-down handles 90% of cases. Reserve thinner solvent for serious contamination scenarios only.
Skipping safety steps is exactly how a $20 cleaning job turns into a $300 replacement. Run through this checklist every single time, without exception:
Never use a standard household vacuum near an open motherboard — the static charge it generates can destroy circuitry even without direct contact.
Having the right RAM matched to your motherboard also contributes to overall system stability. If you're rebuilding around a clean board, our best RAM for Ryzen 2700X guide covers well-matched kits worth considering.
This is your first line of defense and the safest method for routine how to clean motherboard maintenance. Hold the can upright and use short, controlled bursts at a 45-degree angle — never closer than three to four inches from the board's surface. Tilting the can can release liquid propellant that damages components.
Work systematically from top to bottom, left to right, so you're always pushing debris away from already-cleaned areas. Focus extra attention on heatsink fins, RAM slots, and the area surrounding the CPU socket. An electric air blower gives you more consistent airflow and eliminates the propellant risk entirely.
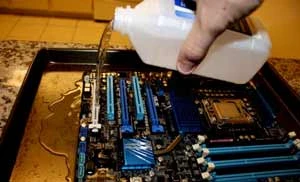
Use 90% concentration or higher — anything lower contains too much water. Dip a cotton swab lightly and gently scrub areas with visible residue, oxidation, or sticky buildup. For larger flat areas, a lint-free cloth works better than swabs and leaves no fiber behind.
Isopropyl alcohol evaporates completely without leaving residue. Let the board air dry for at least 30 minutes before reassembling anything. This method is excellent for cleaning around capacitors and the areas beneath removable heatsinks where thermal paste accumulates over time.
Thinner solvent is reserved for stubborn contamination — flux residue from prior soldering work, adhesive from labels, or heavy oxidation that isopropyl alcohol won't dissolve. This is an aggressive chemical that demands extra caution. Work in a well-ventilated space, wear nitrile gloves, and apply it only to the specific problem area using a cotton swab.
Never flood the board. Apply sparingly, scrub gently, then immediately follow with a compressed air blast to clear loosened debris. This method is not for beginners or routine maintenance — treat it as a precision tool for specific contamination problems, not a general-purpose cleaner.
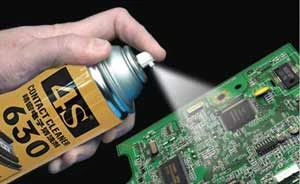
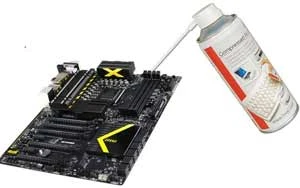
Purpose-made electronic contact cleaners are formulated specifically for PCB surfaces. They're non-conductive, fast-evaporating, and safe for plastics, rubber, and metal contacts. Spray from about six inches away, then follow with compressed air to blast away dissolved debris.
These sprays work particularly well on edge connectors, PCI-E slots, and SATA ports where residue builds up on contact surfaces. If you're also cleaning a video card for an HTPC build, the same electronic cleaner handles GPU edge connectors perfectly. One can covers multiple cleaning sessions.
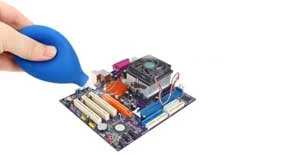
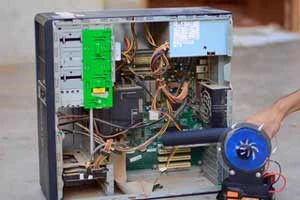
A dedicated ESD-safe computer vacuum is a legitimate tool when used correctly. The key term is ESD-safe — computer-specific mini-vacuums use conductive materials designed to prevent static buildup, which is exactly what standard household models do not do.
Use the vacuum to lift loosened debris after a compressed air session, not as a standalone solution. Keep the nozzle moving constantly and avoid direct contact with traces or components. The combination of compressed air first, then vacuum second, is especially effective for cases with deeply recessed areas where debris collects and compressed air alone can't fully clear it.
Here's the financial reality that makes learning how to clean motherboard components worth your time:
Compare that to replacing the board. A mid-range ATX motherboard runs $120–$250. A high-end platform board easily exceeds $400. Add shop labor — typically $75–$150 per hour — and one deferred cleaning session costs you ten times what the supplies would have.
The $40 you spend on a cleaning kit today is the same $40 that saves your $250 motherboard next year.
Reducing how often you need deep cleans also saves money over time. A well-chosen set of static pressure fans running a positive-pressure intake configuration reduces dust ingestion by 30–40%, directly cutting your cleaning frequency. For network-connected builds, keeping your entire setup clean and well-maintained — including peripherals covered in our wireless ethernet bridge guide — ensures consistent system reliability.
Cleaning frequency depends on your environment, but these intervals work as solid baselines for most users:
Where your PC lives matters as much as how you clean it. Keep the case elevated off carpet — carpet is simultaneously a dust magnet and a static electricity generator. Maintain at least six inches of clearance on all sides for proper airflow, and position intake vents away from the floor where dust concentration is highest.
In high-humidity environments, a small silica gel desiccant pack placed inside the case prevents corrosion on exposed metal contacts. Positive pressure setups — where intake fans outnumber exhaust — push filtered air through the case and prevent unfiltered air from entering through gaps, cutting down on internal dust accumulation significantly between sessions.
Yes, for light dust removal with compressed air. For a thorough clean involving isopropyl alcohol or contact cleaner, removing the board gives you far better access to all surfaces and eliminates the risk of liquid running onto the case floor or other components during cleaning.
Use 90% concentration or higher without exception. Common 70% rubbing alcohol contains too much water, which can cause oxidation on circuit traces and leave residue behind. 99% IPA is ideal — it evaporates almost instantly and leaves no trace on the board.
Wait a minimum of 30 minutes after using isopropyl alcohol, and at least 60 minutes after applying electronic cleaning spray or thinner solvent. The board must be bone dry before power is applied. When in doubt, wait longer — the extra time costs nothing compared to a short circuit.
A clean motherboard isn't just maintenance — it's the simplest, cheapest insurance policy you'll ever buy for your entire system.


About Malcolm Woods
Malcolm Woods is a technology writer and sustainability advocate with a background in consumer electronics and a long-standing interest in the intersection of technology and environmental impact. He has spent years evaluating tech products — from smartphones and smart home devices to solar-powered accessories — with a focus on real-world performance, longevity, and value. At the site, he covers tech accessory reviews, smart home gear, buying guides, and practical how-to content for everyday technology users.
Go for the FREE Gifts. Or check out for free energy books from our best collection.
Remove Ad block to reveal all the secrets. Once done, hit a button below